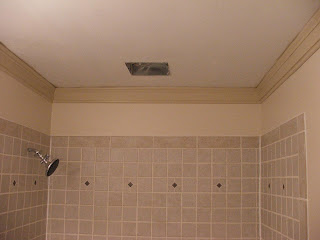
Back on February 7th I posted about the fact that we were close to being done with our major bathroom renovation project. Well folks, not counting the fact we still don't have a ceiling in our dining room, the bathrooms are done. Both of 'em. 2 brand-spanking-new bathrooms. All by my own hands (with a little help from some wonderful friends). And here for your viewing pleasure, the year in pictures....
**************************************
The beginning - this is the part of the ceiling in our dining room that was getting the severe water damage. I thought it was the pipes but it turned out to be the A/C vent pipe that took a 90 degree turn upwards here. The condensation that formed on the pipe dripped down onto the Sheetrock and caused the damage. Thank god it wasn't the pipes.
Having to tear down the ceiling required the furniture be moved out of the room. It provided for a temporary playground for the kids.
Bathroom #1
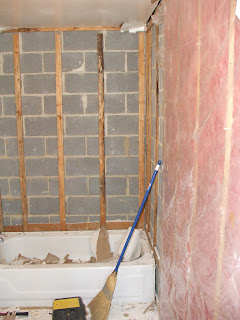
Starting the bathroom demo. Absolutely no tears were shed when this was started.
You know those movies with the disclaimers that "no animals were hurt in the making of this film"? This was exactly the opposite. I hurt this stuff as much as possible when I was tearing it out. And, I am not shamed to say, it felt good!!!! :)
Notice the rot in the corner? The tub has shower doors when we moved in. One of the first things I did was remove them because they are just magnets for water leakage and we just couldn't do baths with that track cutting into our arms. I knew things weren't good because the tiles kept getting looser and looser. I didn't imagine the water damage was going to be so bad though.
This was funny. As JAM started taking showers by himself (one thing wifey and I do is stress independence where appropriate) I wrote this reminder on the shower wall in soap crayon. I took a picture because I wanted to remember it.
Installing the new tub.
Here is Mike, a good friend and former colleague, as he was installing the plumbing for the new tub.
Here is the first color we tried on the walls. It didn't last long.
Beginning the tiling process. This scared me. A lot. I kept putting it off and putting it off. Weeks went by before I sucked it up and dove in.
Originally we had intended to save some money and put adhesive vinyl tile down on the floor. But, after further consideration, and looking at the real costs, it turned out that ceramic tile was the right way to go. I think it was a good decision.
With the floor and tile done it was time to move on to the sink and lighting.
I started this video to show how the project literally took over most of our house at times. Looking back on this, how the heck did we live this way?
Mike came back over after work one day to assist with the install of the sink and toilet. It was supposed to be a good day. I was going to install the mirror while I was waiting for Mike to come over and he was going to take care of the plumbing. Much was going to get done and by the end of the day the mirror was going to be up, the sink and toilet were going to be usable, all was going to be great... As you can see, Mike's part went off without a hitch.
Me on the other hand... and I do stress the word "HAND." Yeah, there was a problem. My plan was to adhere the sheet mirror to the wall with construction adhesive and then build a frame of molding around it. To adhere the mirror to a flat wall though I thought it would be a good idea to score the wall a little bit, you know, to give the adhesive something to grab onto. So, as I was scoring the wall my utility knofe slipped out of my hand. I had installed the brand new, $100+, counter and sink a few days before and all I could think about was having to go out and buy a new counter because the knife gouged a big hole in it. So, what did I do? Yuppers, I reached out and tried to catch the knife. Now, you would expect that I would be more than likely to catch part of the 95% of the knife that is perfectly harmless. But NOOOOOOOooooooooooo. I have to have the worst luck in the entire world and the knife cme straight down, pointy end first. The thing stuck me right in the palm of my left hand and bounced out. Even with the wound it still landed on the counter but other than a healthy dose of my blood it was none the worse for wear.
I strongly advise you that you may not want to view these next few pictures. I took them for posterity's sake only. But, of course I had to include them here...
Moving along a few weeks, here is the almost done first bathroom. Still have the nail holes in the molding to fill in and paint but other than that, all is good. Yeah!!!!! One bathroom down.
Bathroom #2
You know how when you buy a house and you know you would like to change things but it will be a while so you just learn to live with what you aren't exactly thrilled with? It had been three years or so before I was able to work on our bathroom and honestly, for my mental safety, I had mostly put the poor quality of our bathroom out of my mind. Or if not out of my mind, I at least tucked it far back there, behind the calculus and Spanish-American War information. But, when I finally got to start this project it all came flooding back to me how nasty this bathroom was. Thank god I got to tear this place apart....
Some before pictures:


A huge thanks goes to Drew who came over and helped me tear the place apart and take it all to the dump.
This is the intro video... A while back, when I first started thinking of the project, I had laid out the Sheet Rock I thought I would need. So, smarty that I am, I took this video to be able to see later where I thought the sheets should go.
The water damage in this bathroom was even worse than in the first. Shower doors are NOT a good thing, especially in a house where the people don't know how to keep up with their caulking.
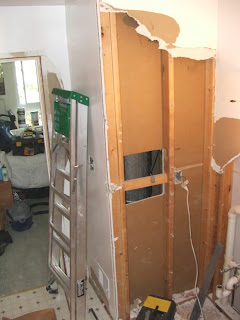
The original idea was to put a second layer of sub floor over top of the existing one but after I started tearing out the old vinyl it became apparent that I would have to go all the way down to the joists. I even had to cut away some of the wall that housed the plumbing for the shower because it was rotting away.
The new sub floor looking up from below in the dining room and above in the bathroom. I reinforced the joists (in both bathrooms) because of the extra weight of the ceramic tile and I didn't want the joints in the tile to crack.
I tried out about 4 different tubs before I found one I liked. At first I started with a tub with jets but it was really flimsy. Then, wifey and I talked and decided we wanted a deeper and wider tub so after a few more tries we finally found one at Fergusons. It is 19" deep and 32" wide so it is about 5" deeper and 2" wider than our old tub. I had to build out the wall that has the plumbing in it a bit to allow for more tile.
To upgrade a bit I moved the vent fan into the shower area and added an all-in-one light. That required a bit of electrical work. I had to tie in to a very strange wiring system so I drew a funny little diagram to help myself out. Had to take a picture of that.
Because I moved the vent I had to cap the old vent tube and install a new one. For this one I went straight up and out the roof. I had to cut through the shelving I had installed in the attic.
The Sheet Rock and Durock are upstairs and ready to be installed. Thanks again to Drew for helping me with the fun task of carrying this load up the stairs.
I added a bit of leftover sheet insulation around the tub. Not sure what it will do but it couldn't hurt right?
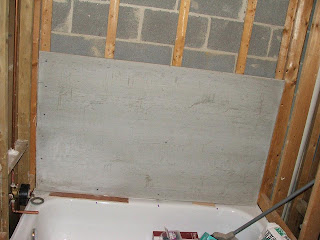
Building out the wall for the plumbing. I added the 1/8" sheet of hardboard so the tile would lay flat against the lip of the tub. That was a little trick I learned after doing the first bathroom. Tubs come with the drain flange around the sides so water isn't channeled down into the wall. But, when you put the Durock over top of that, then the tile doesn't lay flat. So, the hardboard builds up that space so the tile can now lay flat. Nice huh? Who's a smarty????
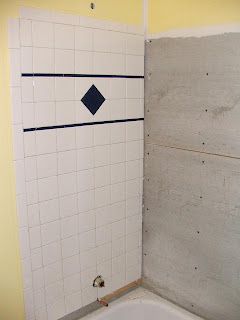
The Durock goes up.
The Sheet Rock goes up. And a nice view of Drew it is!
Lots of supplies for this project. And they tended to be all over the house at any given time. How did we stand it? More importantly, how did wifey stand it?
View of the floor with the Durock down.
And the tile begins!!!! YEAH!!!!
In the kid's bathroom I did all my cutting outside because it was close to the stairs and each to get in and out of. For our bathroom I would have had to walk much further and I had a bit more space to work with, so I brought the saw into the bathroom to do the cutting. I bought a huge plastic tarp and taped it to the walls so I didn't have to worry about the water spray getting on the unpainted Sheet Rock. A huge thanks should go to Mike for allowing me to borrow his wet saw. That saved me a bunch of money.
The "finished" wall tile. No grout yet.


This video starts with a look at how we had to live with all the materials in our bedroom. We were living with the baby in our room at the same time. Lovely place for the young one to go to sleep at night huh?
The floor tile came next. We chose the tile for this room because it allowed us to match the floor to the wall.
Now the grout...
Looking much more finished...
The molding goes in. Again, because of the distance and extra space I brought the saw into the bathroom to do the work. I borrowed Dad's nail gun again and that little bundle of joy saved me a ton of time and work. Thanks Dad!!! Had to put the cabinets in at the same time so I knew where the base molding would go. Lots of change all at once.
The plumbing goes in and we are almost there!
The molding and ceiling is painted.
That's it folks. The fixtures are in, the touch ups are done, the towels are hung. Now, if we can only find an extra long shower curtain we will be all set. :)


